Embedding YouTube Videos and Multimedia Content on Your WebX Website
Embedding YouTube videos into your page:
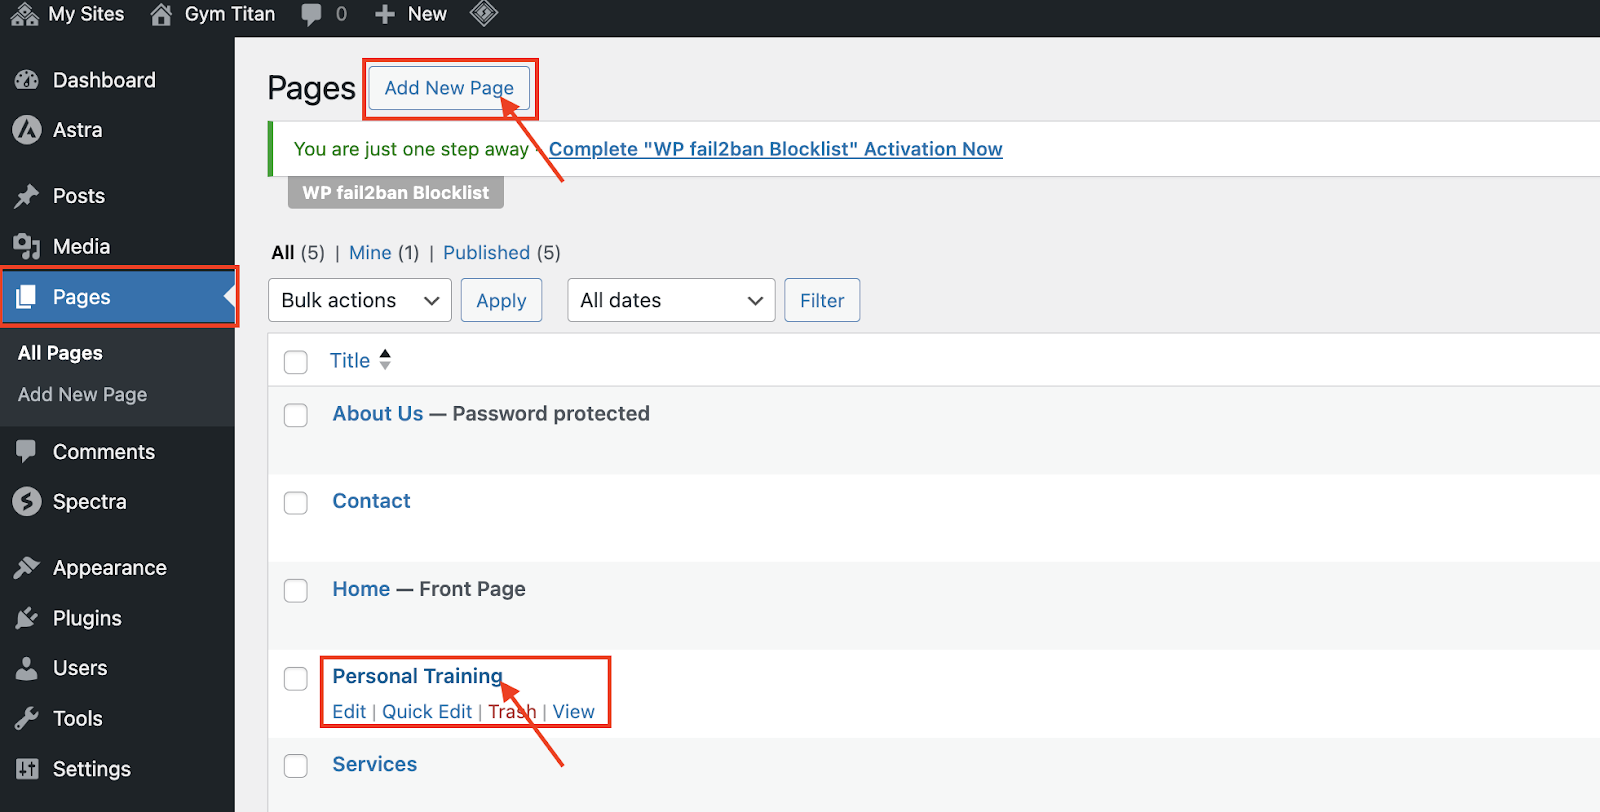
- Log in to your WebX Admin Panel dashboard.
- Click on Pages on the left panel menu. Then, create a new post by clicking Add New Page or you can edit an existing one by clicking on the Page Title.
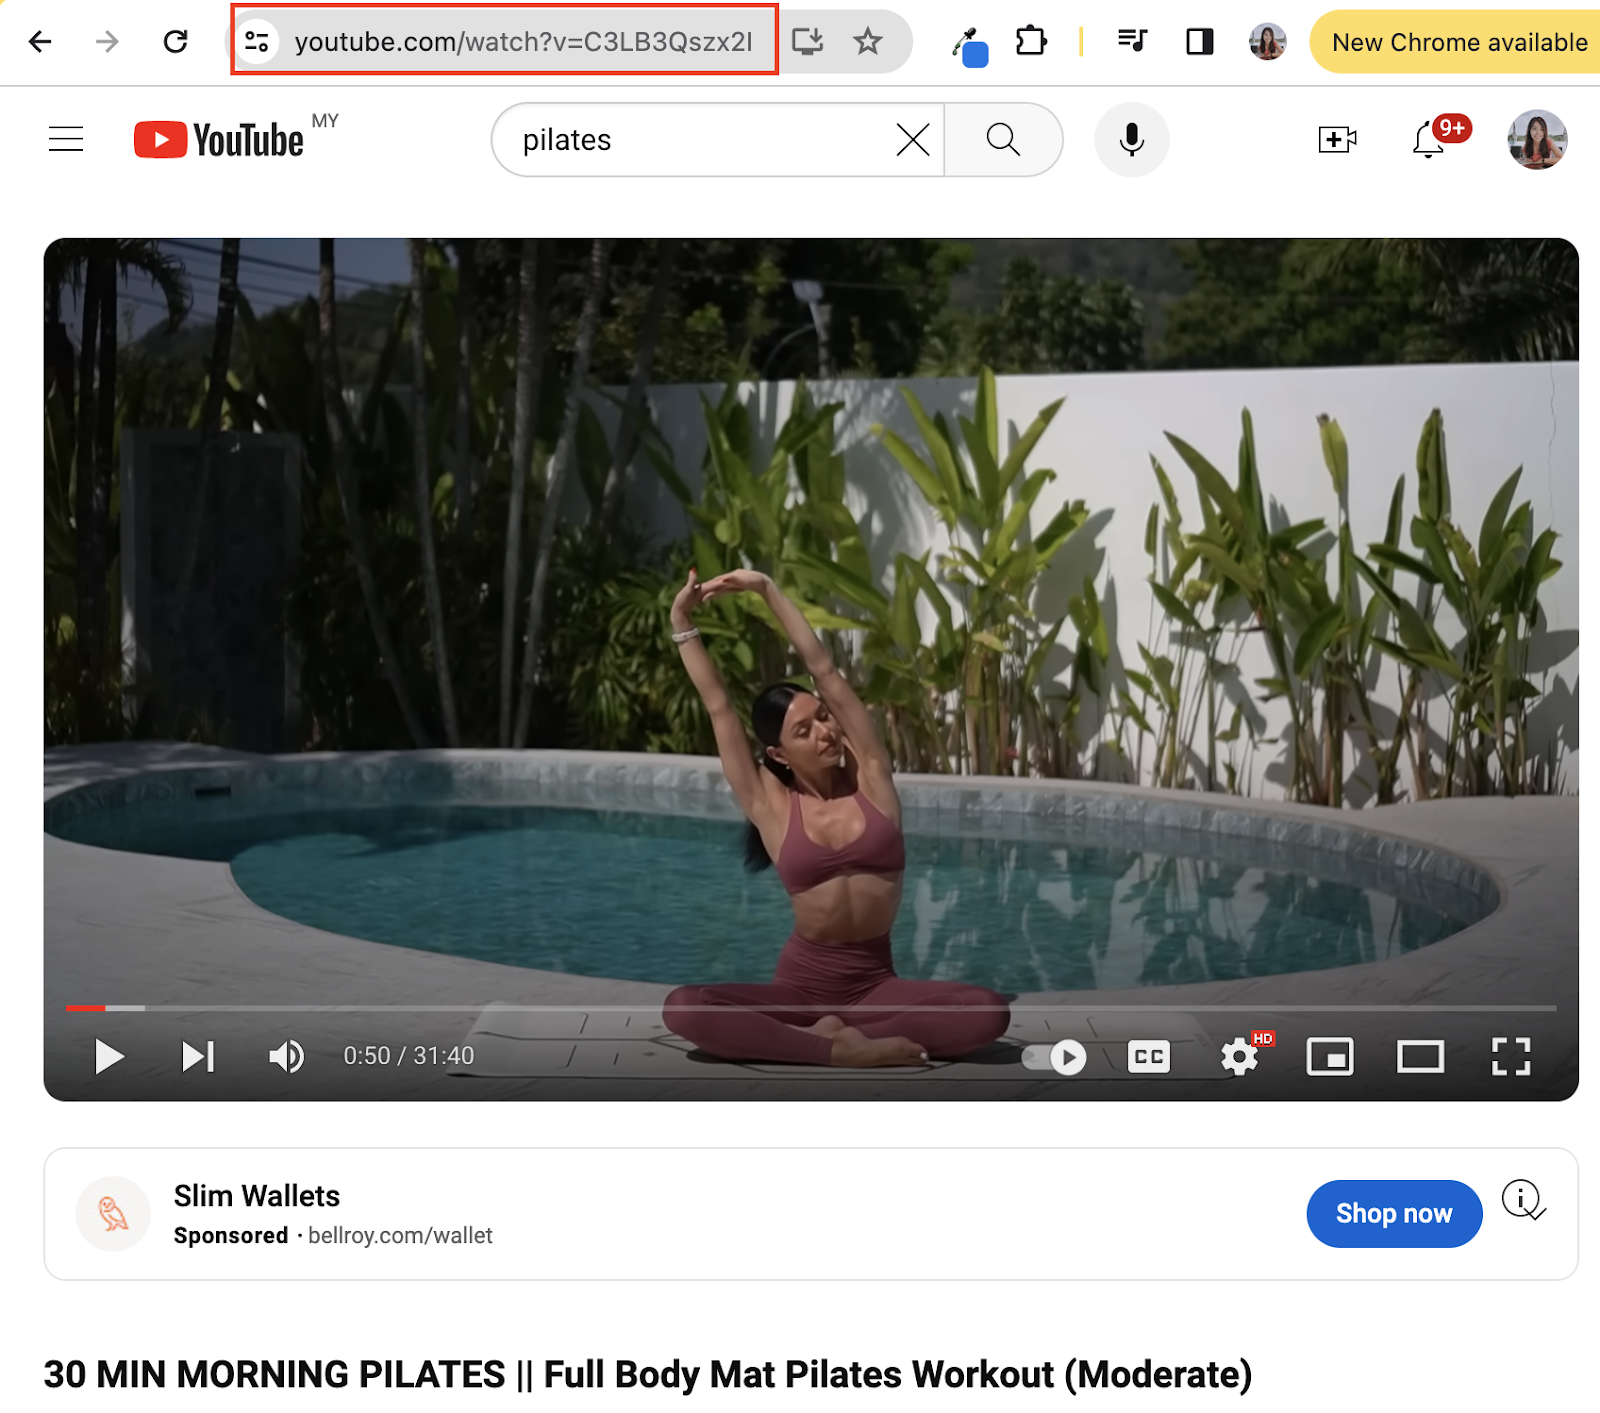
- Open the YouTube video you want to embed and copy the URL from your browser’s address bar.
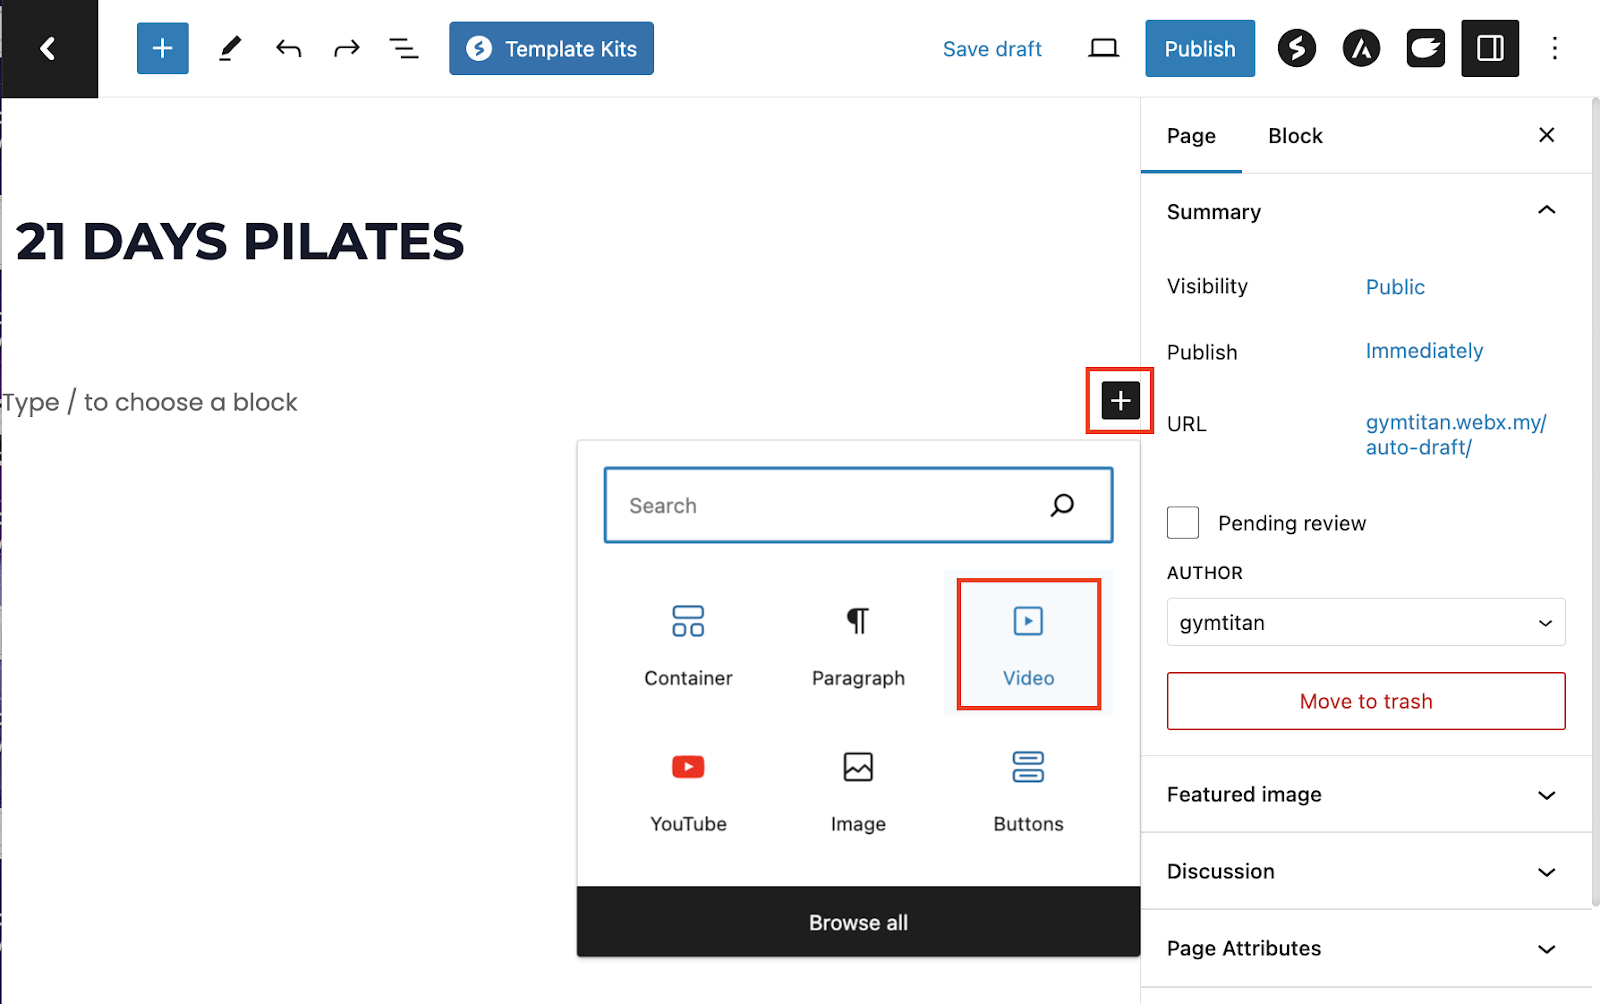
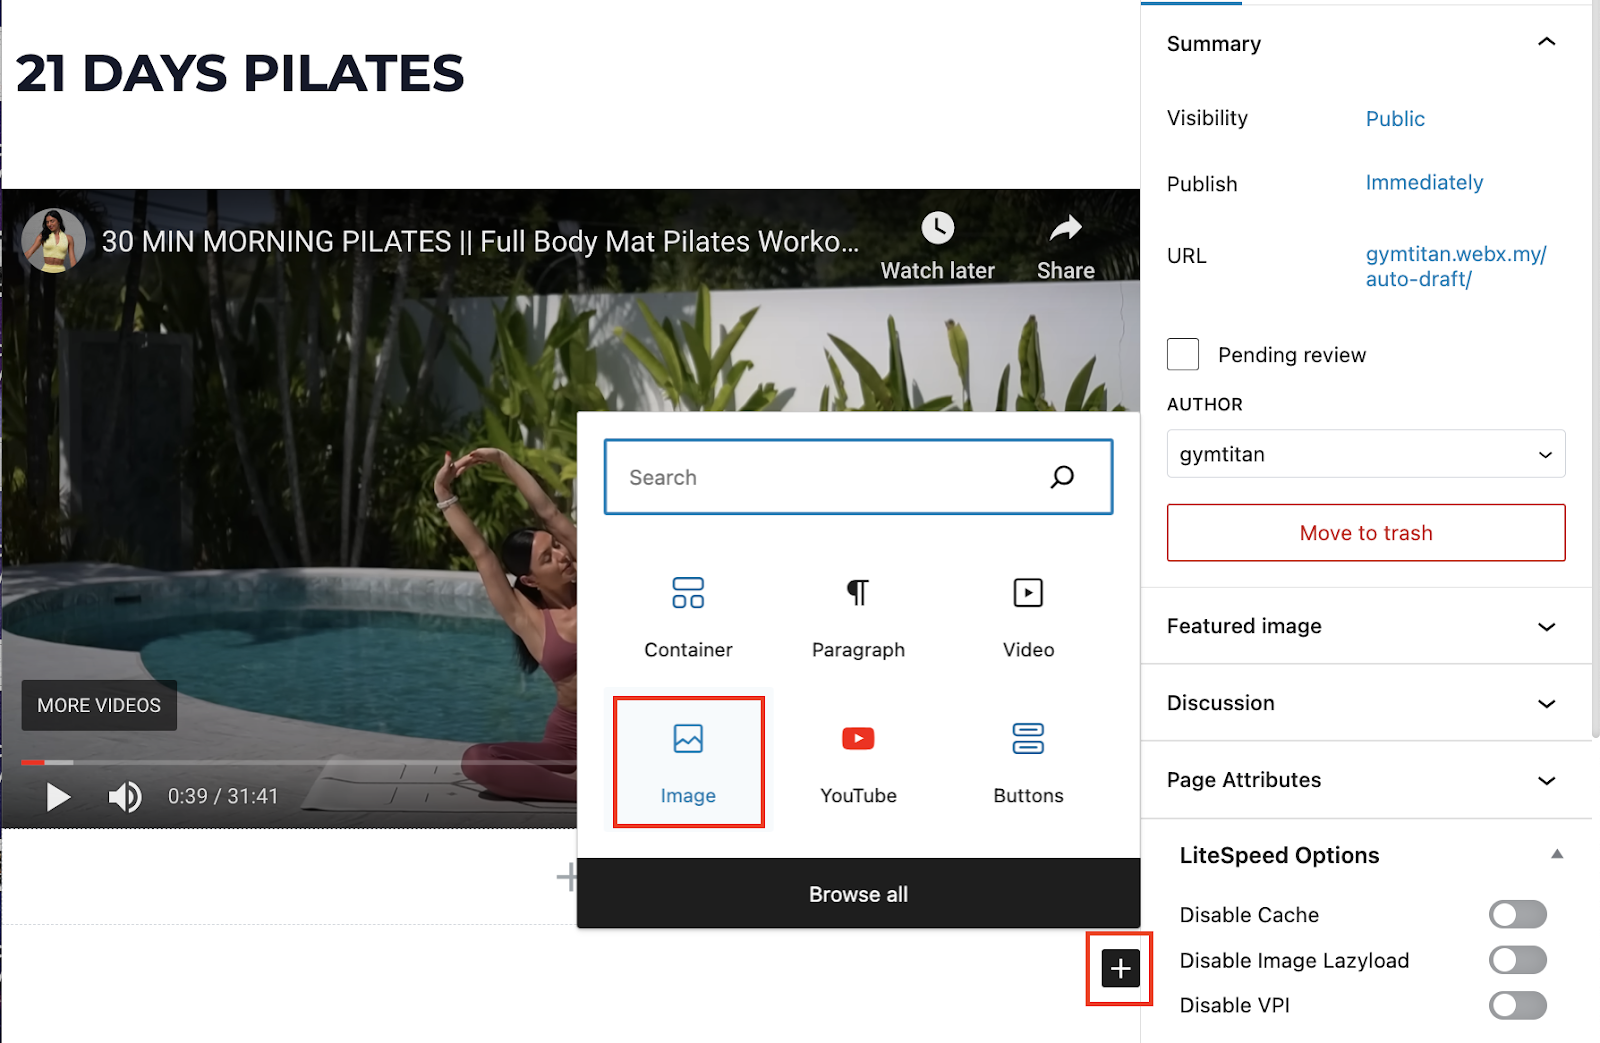
- Go back to the WordPress Page, click on the + sign button. Then, click on the Video icon to add a video to the post.
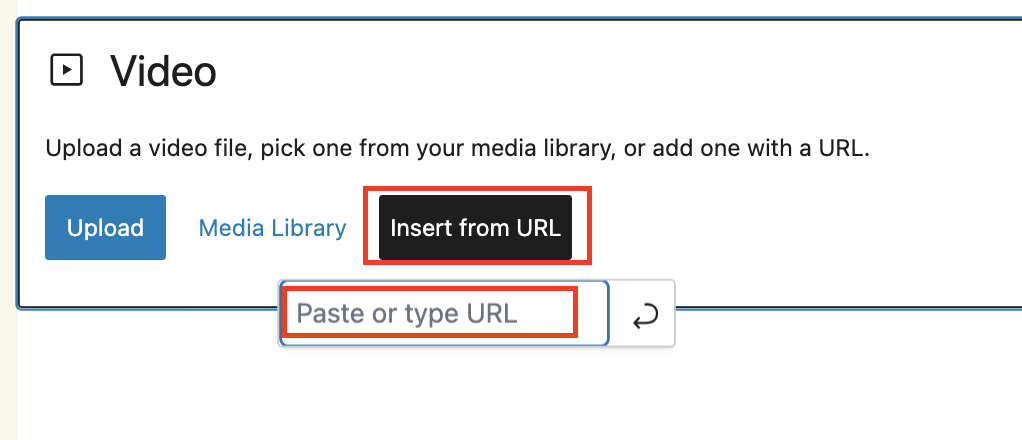
- Click on Insert from URL. Paste the YouTube video URL and click Apply.
- Alternatively, you can click on Upload to directly upload your video file or click on Media Library to select existing video in the library.
- WordPress will automatically recognize the URL and convert it into an embedded video player. Preview your post to ensure the video displays correctly, then publish.

Embedding images into your page:
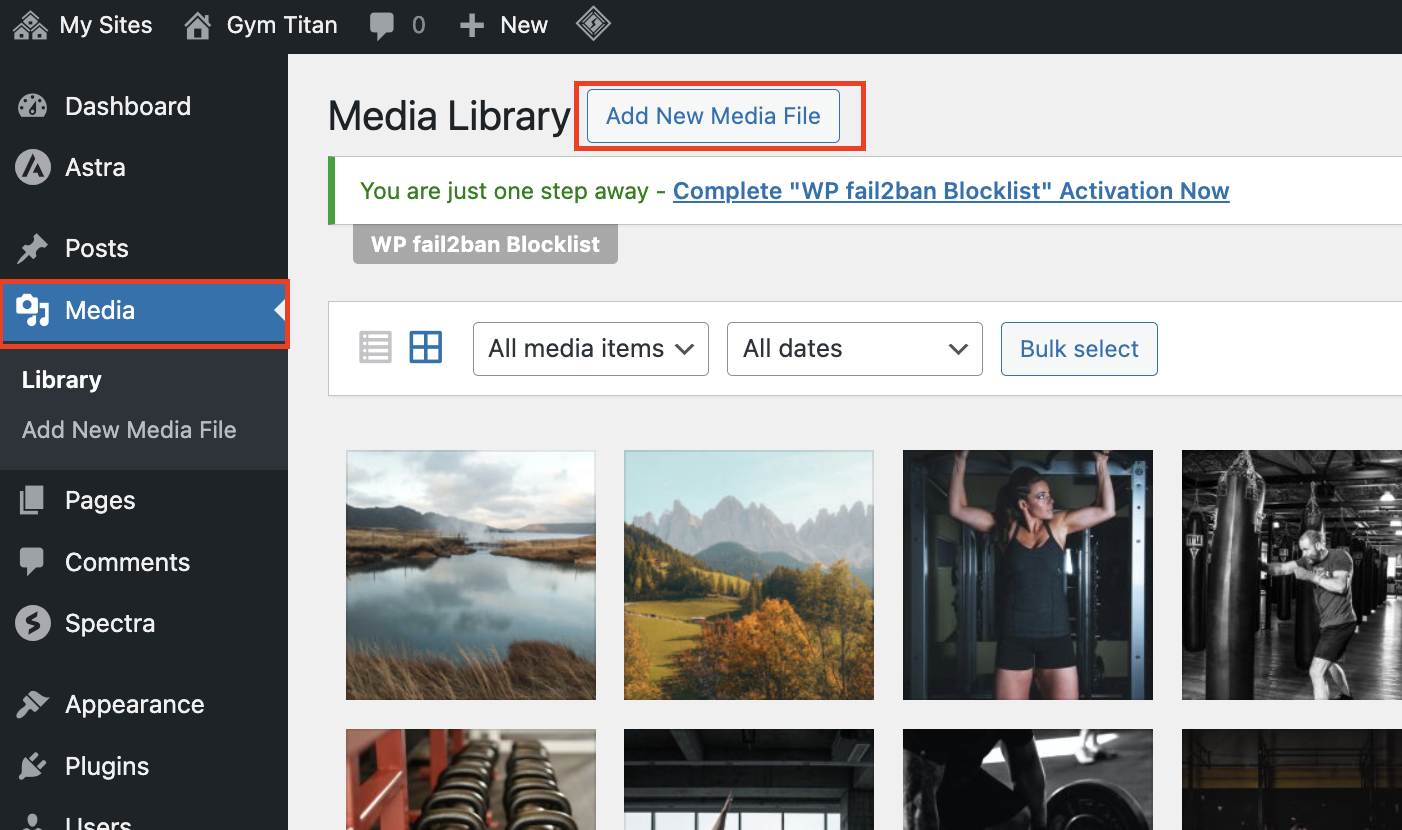
- Log in to your WebX Admin Panel dashboard.
- Click on Media on the left side panel.
- Click on Add New Media File.
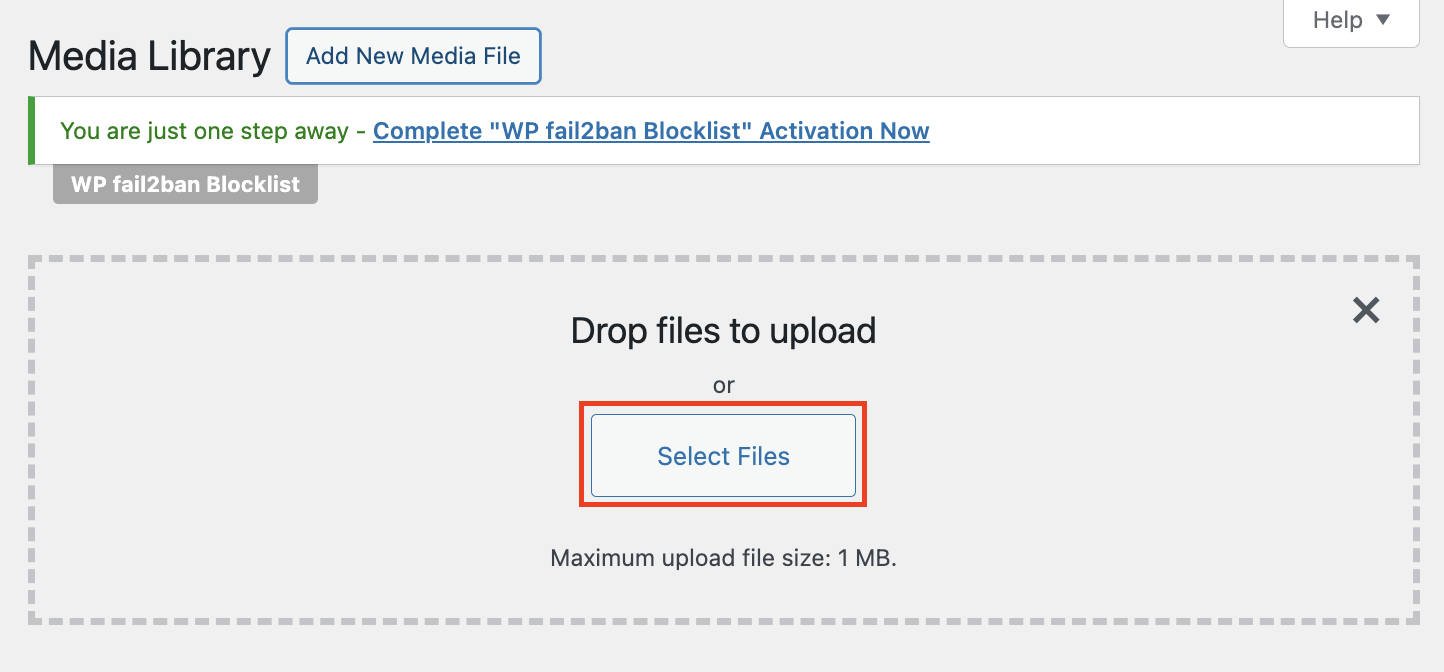
- Click on Select Files and upload the image. The image will be directly added to your WordPress media library.
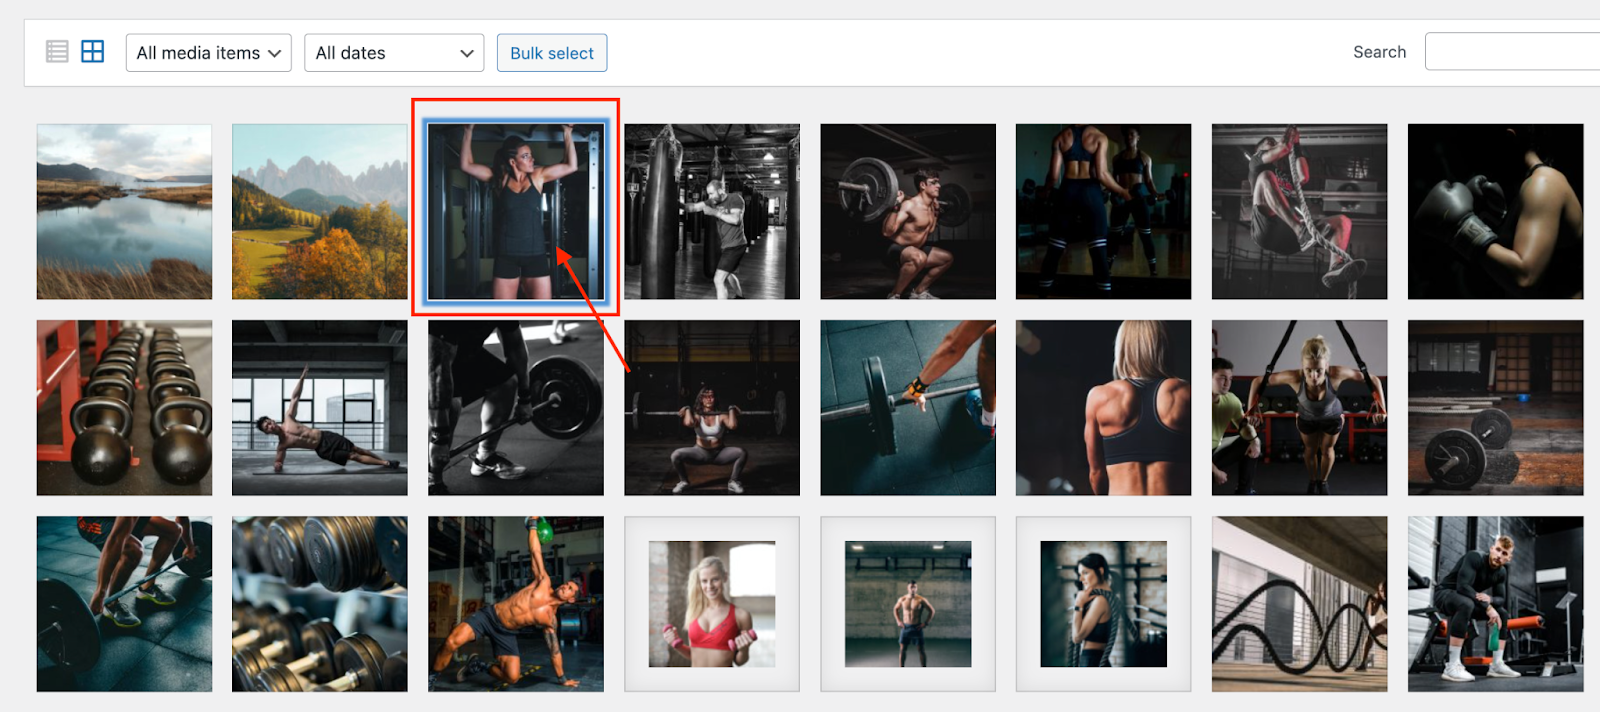
- Click on the image in the media library which you would like to add to the post.
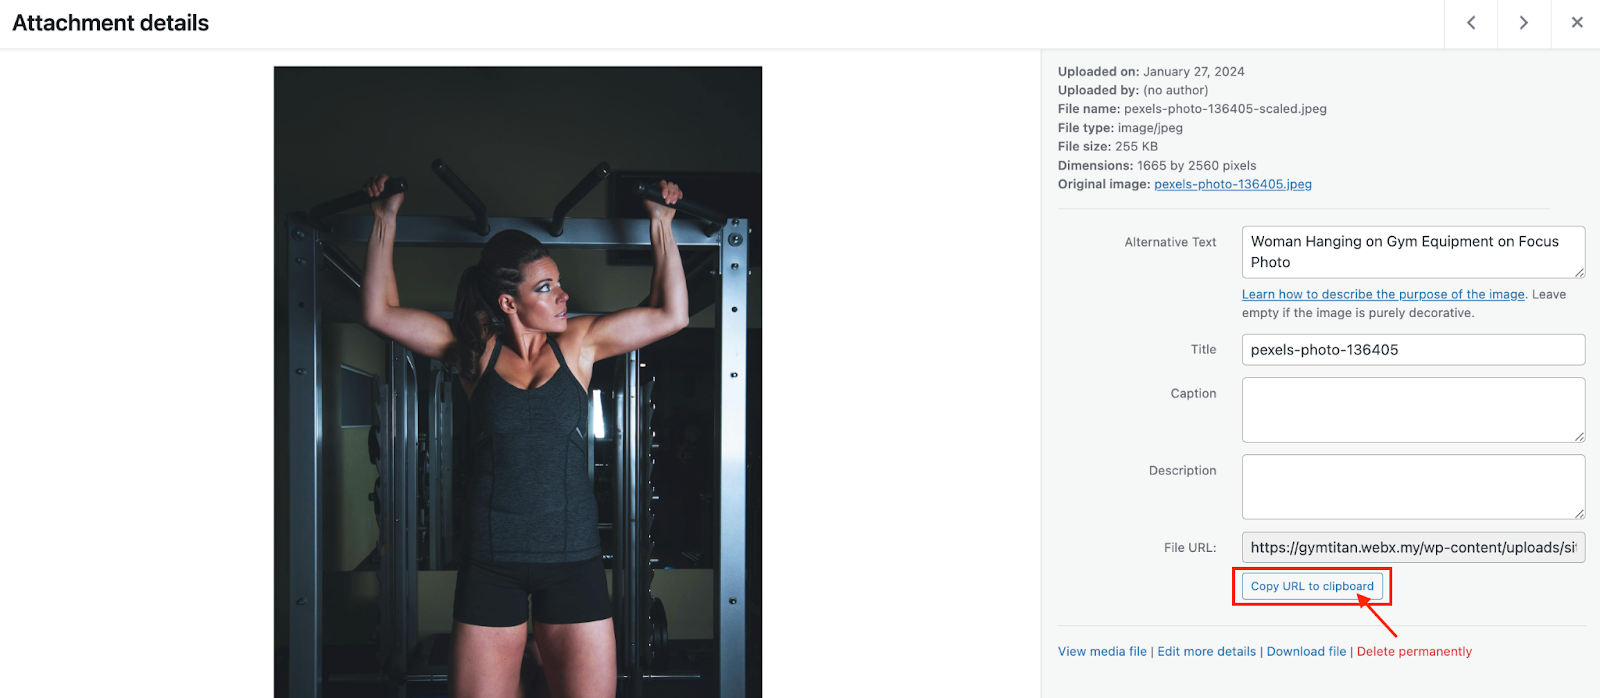
- Click on Copy URL to clipboard.
- Go to your WordPress Page editor, click on the + sign button and click the Image icon.
- Click on Insert from URL. Then, paste the URL where you want the image to appear.
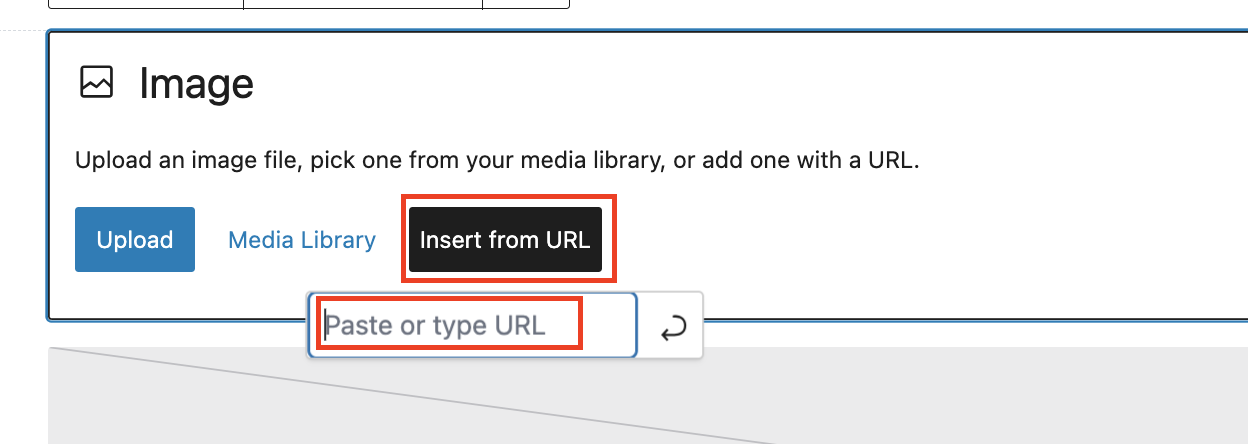
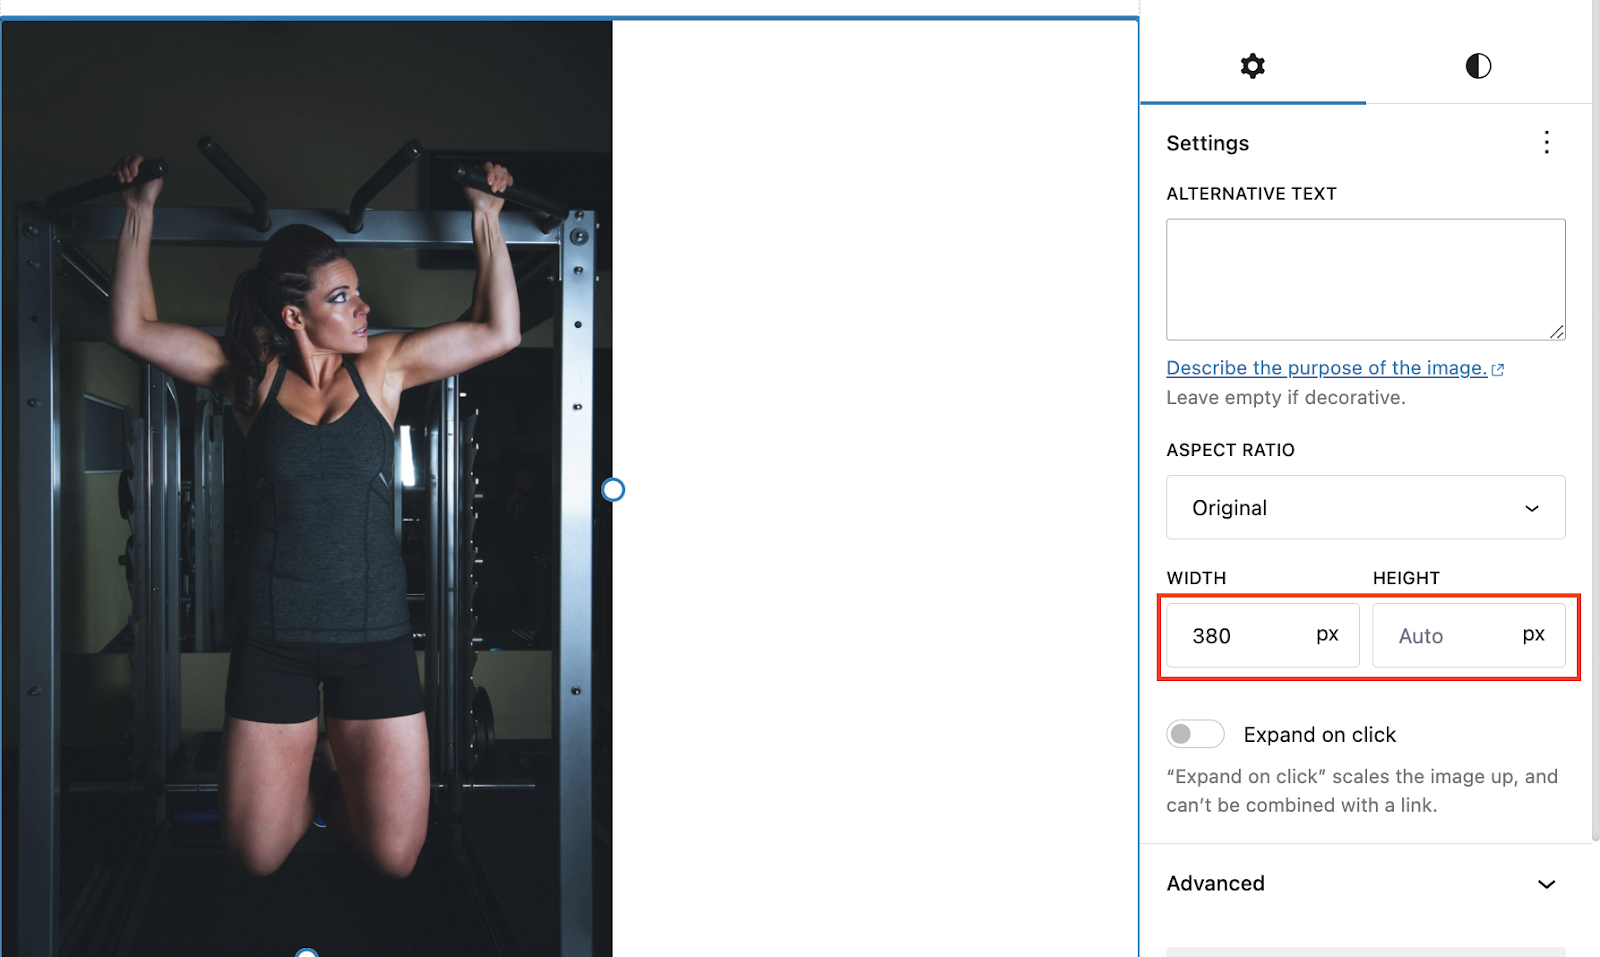
- WordPress will automatically recognize the URL and convert it into an embedded image. You can adjust the Width or Height of the image on the right panel.
10. Preview your page to ensure the image displays correctly, then publish.